After setting up the project grid, the next step is to define the story heights for your building.
» Lesson 6 – Create a Grid in Archicad
Story Settings in Archicad
To open the Story Settings dialog, go to Design > Story Settings… (or press the shortcut Ctrl + 7).
In this dialog, you can add or delete stories, set story heights, and control whether the story levels are displayed in elevation and section views.

Parameters in the Story Settings dialog
Insert Above / Insert Below: Add a new story above or below the currently selected one.
No: The story number. Story “0” usually represents the ground level (commonly assigned to site level or the first floor). Numbers greater than 0 are stories above ground, while negative numbers represent basement levels.
Name: The name of the story.
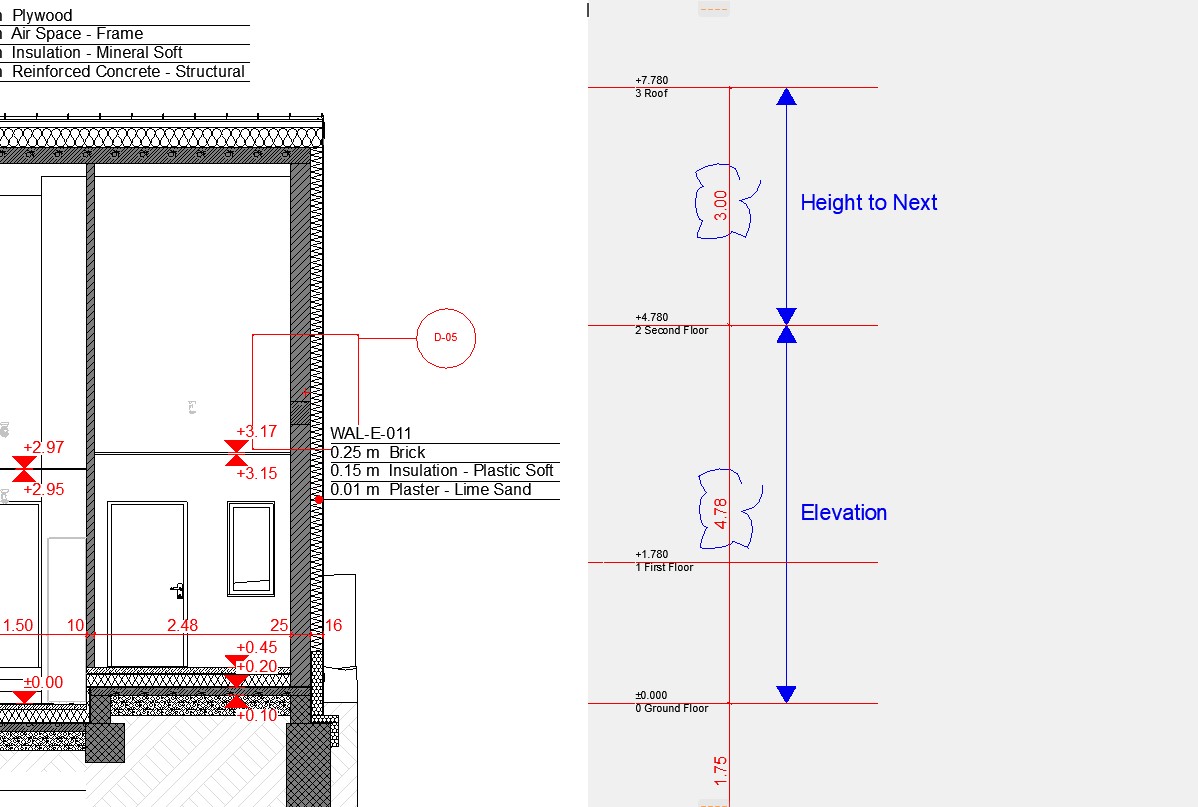
Elevation: The story’s elevation relative to Project Zero.
Height to Next: The vertical height from the current story to the story above. (Note: This is different from the Elevation column.)
Last Column (double triangle icon): Toggle whether the story line is visible in elevation/section views.
Delete Story: Remove the selected story.
Important Notes:
Deleting a story will also delete all elements associated with that story.
Any changes made in the Story Settings dialog cannot be undone. Always double-check before clicking OK to confirm.

Important Notes for Elevation vs. Height to Next
When you change the Height to Next, it will also adjust the Elevation values of stories above (if positive numbers) or below (if negative numbers).
Conversely, changing the Elevation of a story will affect the Height to Next of the stories directly above and below it, while other story heights remain unchanged.
*Insert illustration here for Elevation vs. Height to Next differences

» See Wall Tool Archicad – A Complete Guide for Beginners and Professionals