Next in the basic Archicad tutorial series, I will guide you through creating the roof model.
For roofs, there are two typical types: flat roofs and sloped roofs.
1. Flat Roof
For a flat roof, the simplest way is to use the Slab tool.
Step 1: Open the Roof story view
① ĐFirst, double-click the Roof story view in the Navigator panel to open the Roof floor plan, because we will create the roof model on this story.

After opening the Roof view, you will see that there are currently no objects in this view.
We need to draw the roof boundary to match the edge of the walls on the 3rd floor. Therefore, at this moment, we cannot determine the roof boundary to draw.
Step 2: Show the 3rd floor as a reference
At this point, you need to display the 3rd floor plan as a reference by:
Right-clicking on 3FL
Selecting Show as Reference

In the Roof story view, you will see the objects from 3FL displayed in a light yellow color.
These objects cannot be selected or edited.

You can also adjust the display color of this reference floor plan.
First, open the Trace & Reference settings
(as shown below, or press Alt + T).
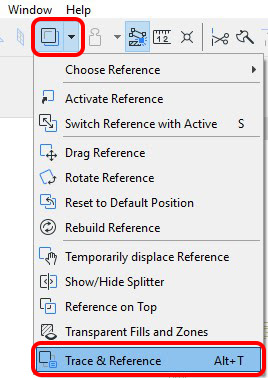
In the Trace & Reference panel, you can:
Change the display color
Adjust the transparency
Or change the reference floor to another story
Here, I am choosing 3FL as the reference floor, changing its color to blue and setting it to 50% transparency for better visibility.

 Result
Step 4: Create the flat roof using Slab
Similar to creating a slab, double-click the Slab icon on the Toolbar and set the parameters as shown.

Click OK, then draw the roof following the reference floor plan.
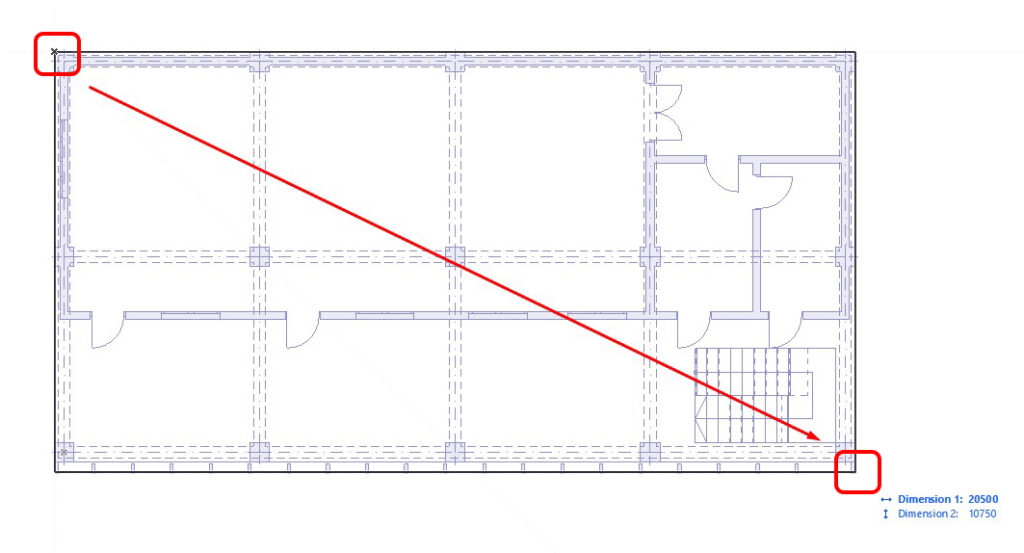
 Model after adding the roof
2. Sloped Roof
The project in our learning series uses a flat roof.
However, in this roof tutorial, I will also guide you through creating a sloped roof.
Step 1: Open the Roof tool
Double-click the Roof icon on the Toolbar to open the settings panel.

Step 2: Set roof parameters
Set the parameters as follows:

Offset to Home Story: 0
Home Story: 3.Roof
to Project Zero: 9000
Roof Thickness: 200
Select Single Plane
Slope angle: 45°
Click OK.
Step 3: Draw the sloped roof
Draw the ridge line → Click to choose the slope direction of the roof.

After selecting the roof direction, start drawing the roof boundary.

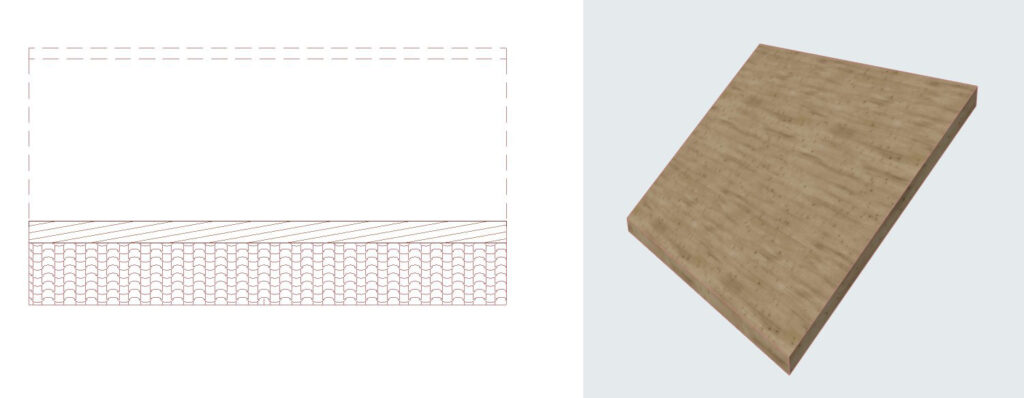 The roof shown in plan view and 3D view
Step 4: Create the opposite roof plane
After creating one side of the roof, use the Mirror command to create the opposite side:
Select the created roof
Press Ctrl + Shift + M
Draw the mirror axis

 Roof model in 3D view
With this, you now know how to create a sloped roof.
Using the same method, you can adjust the roof slope or create additional sloped roof models in other areas of the project.