During the design process, have you ever needed a specific hatch pattern, but couldn’t find a suitable one among Archicad’s default Fills?
In this article, I’ll guide you through how to create a new Fill according to your needs, or how to edit existing default Fills in Archicad.
Creating a Symbol Fill
Follow these steps to create a Symbol Fill:
- Use 2D tools (Lines, Arcs, Hotspots, etc.) to draw a pattern as desired.
(For example, here I use the Line Tool to create a hexagonal shape.)

- Select all the 2D elements you just drew and copy them
(Ctrl + C or Edit > Copy). - Go to Options > Element Attributes > Fills.
- Click New to create a new Symbol Fill.

- Enter a name for the new Fill, choose Symbol Fill, then click OK.

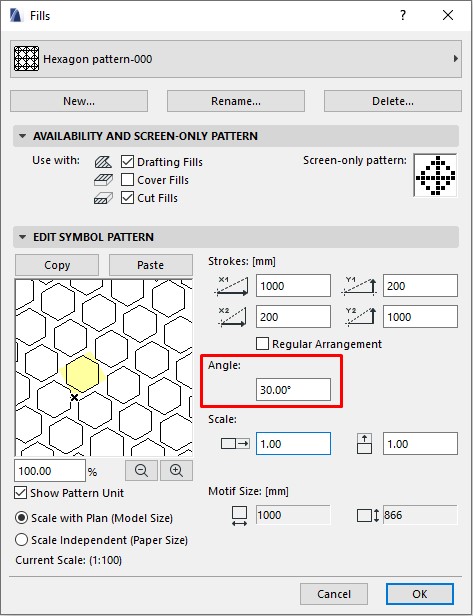
- In the interface that appears, click Paste to insert the previously copied 2D pattern into the Pattern window.
Tips:
– Click the “+” or “–” buttons to zoom in or out of the Pattern window.
– Show Pattern Unit: Displays the pattern unit (highlighted in yellow).
Note: Only 2D elements such as Lines, Arcs, and Hotspots can be pasted. - Use the Control panel on the side to set the size and rotation of the Symbol Fill.
Strokes
To change how the pattern is distributed, adjust the corresponding values here to modify the horizontal and vertical spacing between pattern units.
In this example, I change the Stroke values as shown, and you can see the pattern update in the preview.

Angle: Enter a value if you want to rotate the pattern.
Scale:Use this setting to adjust the size of one pattern unit.
A value of 1 represents the original size. Changing this value will proportionally scale the pattern.
Motif Size :Displays the absolute size of one pattern unit. - After finishing the settings, click OK.