Walls are one of the most essential building elements in Archicad. With the Wall Tool, you can create walls of any shape, thickness, or material to suit your project needs. Whether you’re modeling a simple partition wall or designing a complex curved facade, Archicad gives you flexibility and precision right from the start.
In this lesson, we’ll go through the Wall Tool settings, how to define geometry and structure, and finally how to place walls in different shapes such as straight, curved, trapezoidal, and polygonal.
Wall Tool
Before drawing your wall model, it’s important to configure the wall attributes.
Select the Wall Tool from the Toolbox.
Press Ctrl + T to open the Wall Settings dialog.

Here you’ll find all the essential parameters that control the wall’s geometry, structure, materials, and placement rules. Setting these correctly at the beginning will save you time and reduce errors later in the modeling process.
GEOMETRY AND POSITIONING
Wall Height
Similar to the Positioning Panel in the Column Tool, this panel defines the height and story relationship of the wall.

By default, the base of the wall (Bottom) is linked to the current story (Home Story).
The top of the wall is linked to the story above (Home Story +1).
This means the wall’s height automatically adjusts according to the floor-to-floor height.
If you need more control:
- You can change the wall’s Bottom Link or Top Link to other stories.
- Or select Not Linked and directly input a fixed wall height.
| See: Lesson 7 – Story Settings in Archicad
Wall Structure
On the right-hand side of the settings dialog, you’ll find options to define the wall structure:
Wall type (basic wall, composite wall, or profile wall)
Thickness of the wall
Reference Line position (inside face, outside face, or centerline)
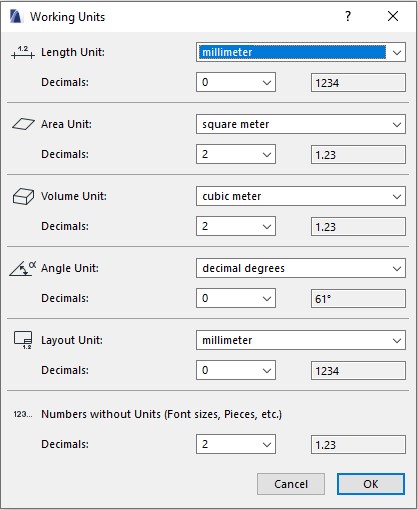
For example, in the default setting, the wall may be defined as a simple wall with a material like Generic – Structural, a thickness of 300 mm, and a reference line located on the exterior face.
| See: Wall Tool Archicad – A Complete Guide for Beginners and Professionals

MODEL
The Model Panel in the Wall Settings allows you to customize the surface finishes of the wall.

You can override the surfaces for the inside face, outside face, and edges of the wall.
If you want all three faces to share the same finish, click the chain icon to link them together.
* Important: There is a distinction between:
Core material (defined in the Geometry and Positioning panel, e.g., brick or concrete)
Surface finish (defined in the Model panel, e.g., plaster or paint)
For example: A brick wall plastered with cement and painted white → brick and cement are the core materials, while paint is the finish surface.
Placing Walls in Archicad
Archicad provides four main methods to place walls: Straight Walls, Curved Walls, Trapezoidal Walls, and Polygonal Walls. Each method has its own sub-modes to give you greater flexibility.

Straight Walls

- Single Wall
- Chained Walls
- Rectangular
- Rotated Rectangular
Curved Walls

- Center and Radius
- Circumference
- Tangent
Trapezoid Wall
A trapezoidal wall works like a normal wall, but instead of uniform thickness, you can assign different thicknesses at each end.
One end of the wall can be thicker, while the other is thinner.
This is useful for special design situations where wall geometry tapers.

Polygonal Walls
The polygonal mode is for special wall shapes.
To use polygonal walls, the wall must be set as a basic wall type.
If you’re using a composite wall or profiled wall, this input method will be disabled.
* Note: Polygonal walls are rarely used in standard workflows, so in this beginner series we will not go into deep detail. For advanced polygonal wall modeling, see the full guide on the Archicad Wall Tool.