In the previous lessons, we completed the model for the first floor.
In this lesson, we will model the staircase connecting Floor 1 to Floor 2.
For beginners who are new to the software, stairs are often considered the most difficult part.
However, once you understand the rules, you will find that this part is not as difficult as you might think.
Starting from Archicad 21, the Stair Tool has changed significantly.
Therefore, if you are using an older version of Archicad, you will notice that the stair settings are no longer the same as before.
The newer versions also provide greater flexibility and customization compared to older versions.
1. Open the Stair Settings
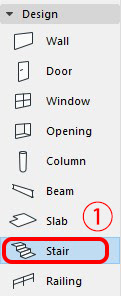
Double-click the Stair icon in the Toolbox to open the Stair settings panel.
2. Stair Settings
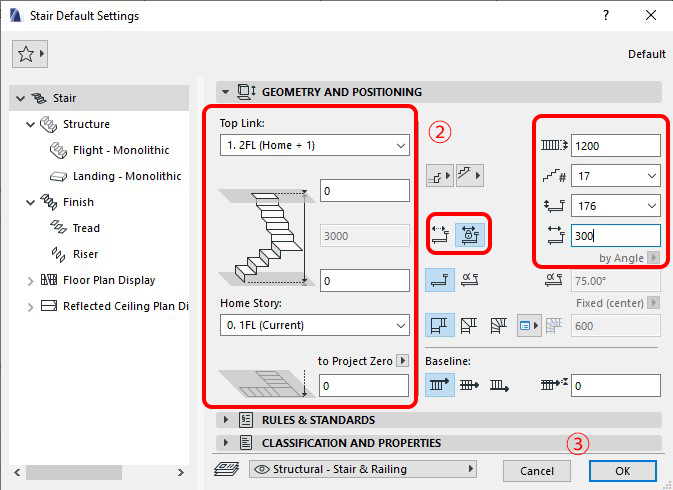
Enter the following parameters:
Stair Top: 2FL
Top Offset: 0
Stair Height: 3000
(Stair height – automatically calculated based on Top Link and Home Story)Home Story: 1FL
Bottom Offset: 0
Stair Width: 1200
Number of Risers: 17
Riser Height: 176
Note
The stair height, number of risers, and riser height are directly related:
Riser Height = Stair Height / Number of Risers
Therefore, when you change one parameter, the remaining values will update automatically.
Example:
Number of risers = 17 → Riser height = 176
If the number of risers is changed to 21 → Riser height will automatically change to 143
After finishing the settings, click OK.
3. Placing Stair
After setting all required parameters, proceed to draw the stair.
You can draw:
A straight stair (single run)
Or a U-shaped stair
In this example, we will draw a U-shaped stair.
Step by Step:
First, click to select the starting point
Then, click the next point to draw the first stair run
This stair has 17 risers, so:
The first run will contain 8 risers
Click the next point at riser number 8 (as shown in the image)
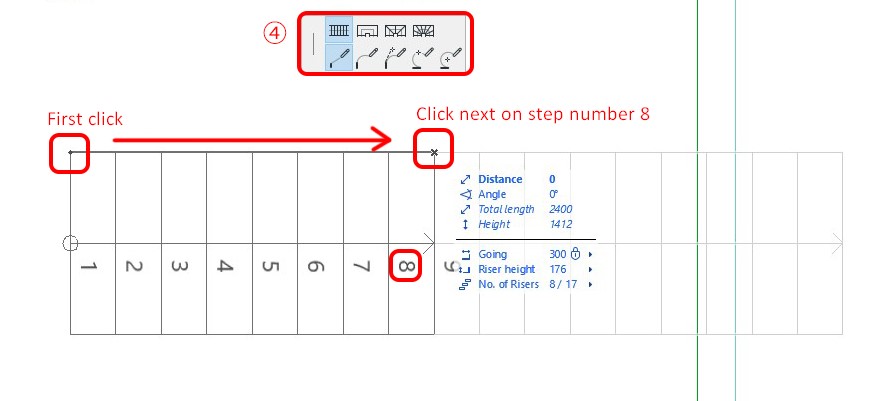
After completing the first run, you need to create the landing
In the Palettes panel, select the landing drawing mode
Click to define the landing boundary
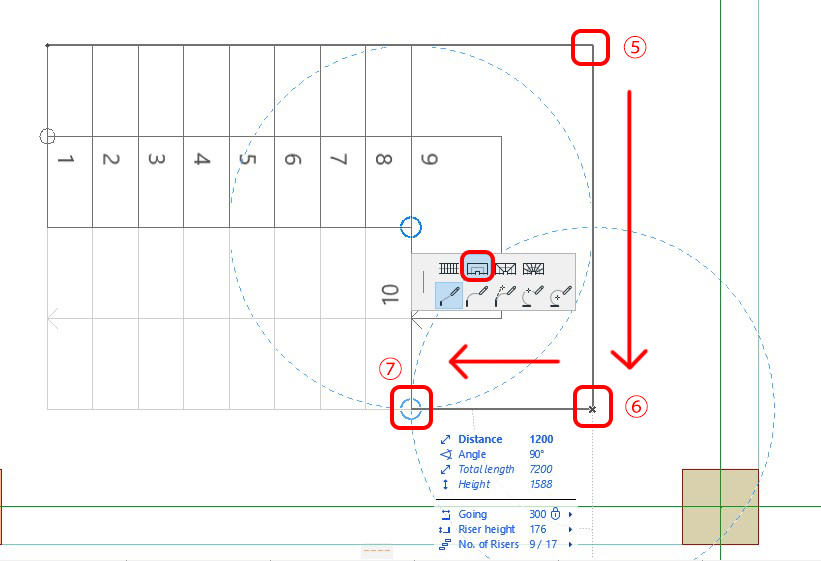
In the Palettes panel, switch back to the stair run mode
Continue clicking to draw the second stair run
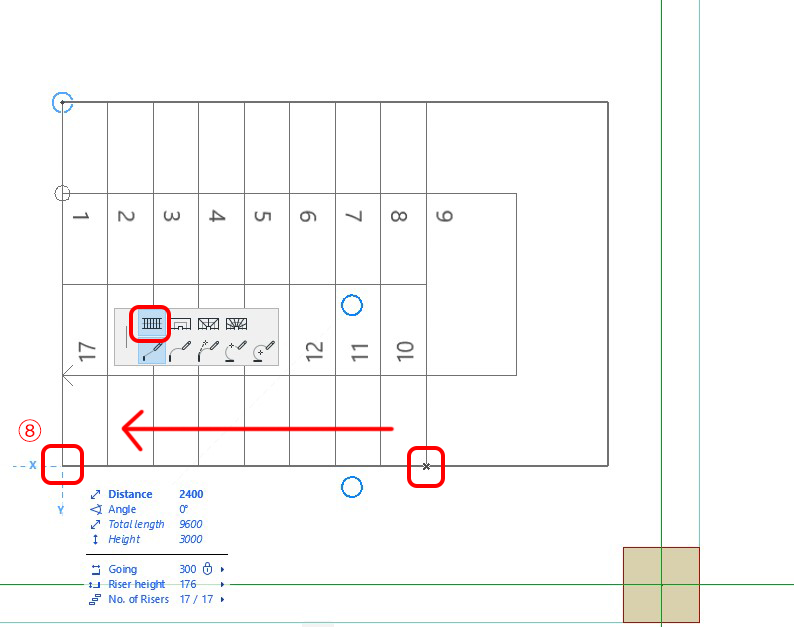
After clicking the final point, the Stair drawing command will end
Use Ctrl + D to move the stair to the desired position
Press F5 to check the stair model in 3D view
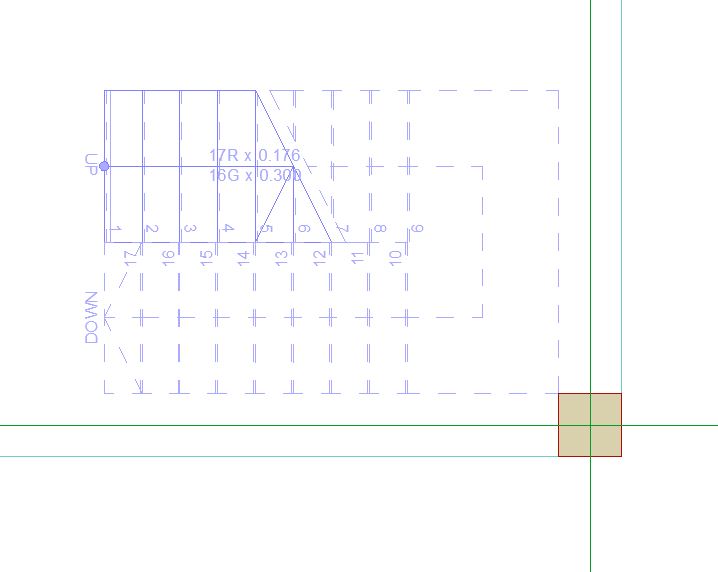
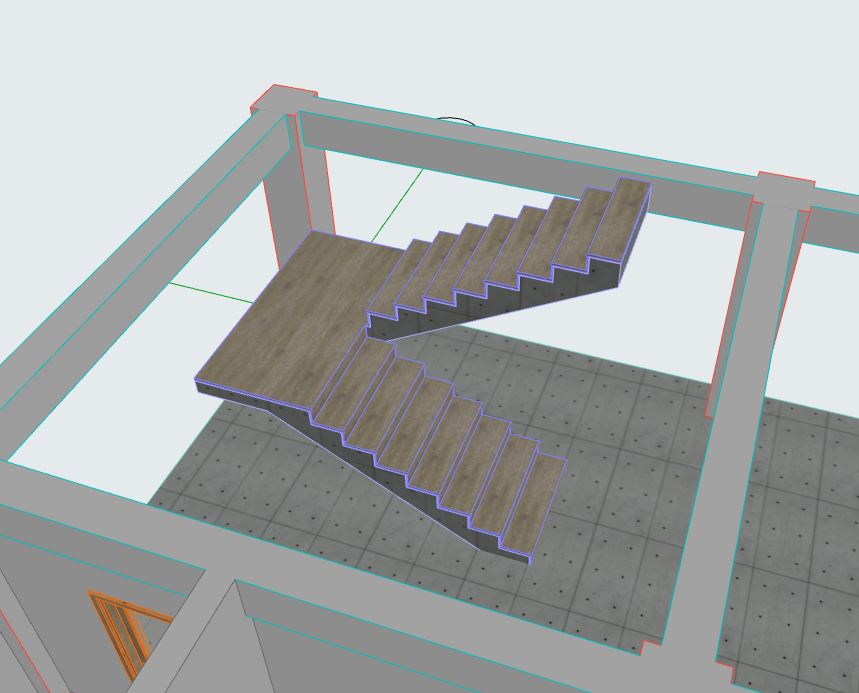
Stair model in 3D view
Notes
Before drawing the stair, you can select Railing (left / right) to automatically add railing geometry to the stair.

Stair with railing enabled
Rules and Standards
In the Stair settings panel, the RULES AND STANDARDS section is used to check stair design standards.
This section mainly relates to architectural design standards, such as:
Riser height, Tread width, Safety and comfort during use
By default, these standards are enabled (checked).
Therefore, in some cases, if you set:
Riser height too large
Or tread width outside the standard range
→ Archicad will not allow the setting.
In that case, simply uncheck the corresponding options in this section.
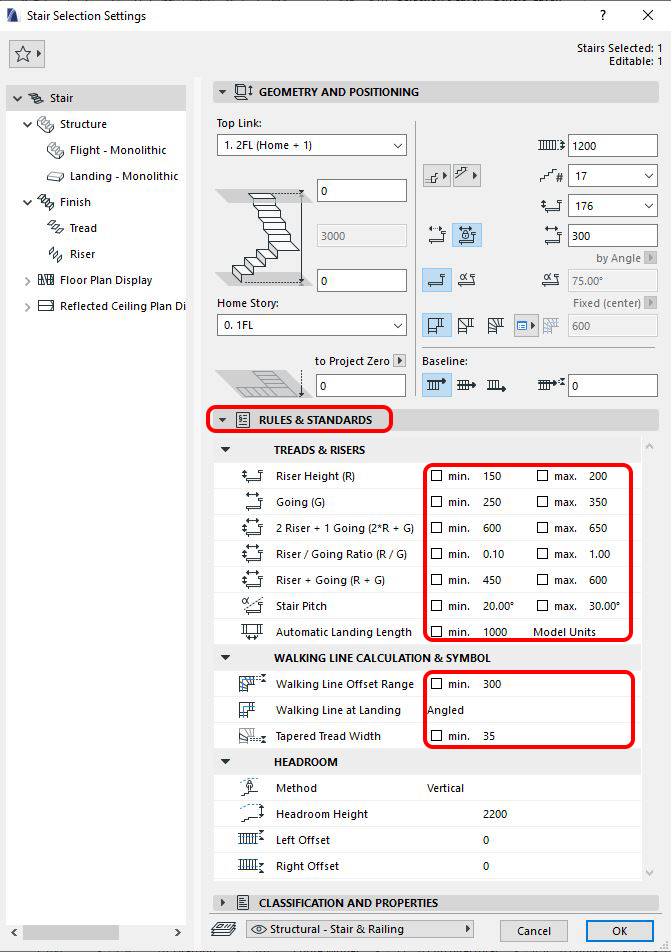
Stair Rules and Standards settings