In the previous lessons, we completed the model for the first floor.
In this lesson, we will continue by creating the model for the second floor.
When modeling the second floor, third floor, or any other floor, the workflow is generally the same as modeling the first floor, as shown in the previous tutorials.
However, there is a faster way to create the model for the second floor:
copying the model from the first floor
(this method is applicable when the second-floor layout is identical or very similar to the first floor).
There are two ways to copy the model from the first floor to the second floor.
Method 1: Basic Copy Method
Step 1
In the 1FL view, select the model elements you want to copy (columns, beams, slabs, walls, etc.).
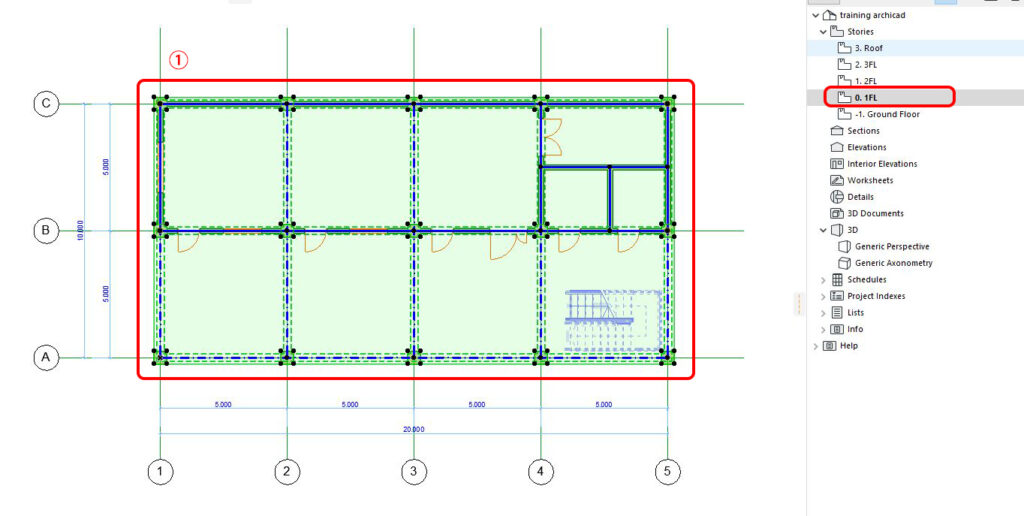 Select the elements to be copied on the first floor
Step 2
Press Ctrl + C to copy.
Step 3
Open the 2FL view, then press Ctrl + V to paste the copied elements onto 2FL.
Click anywhere (outside the flashing copy boundary) to finish the command.

Press Ctrl + V to paste into 2FL
Method 2: Using the Edit Elements by Stories Tool
Step 1
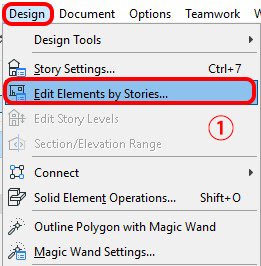
Go to Design > Edit Elements by Stories.
Step 2
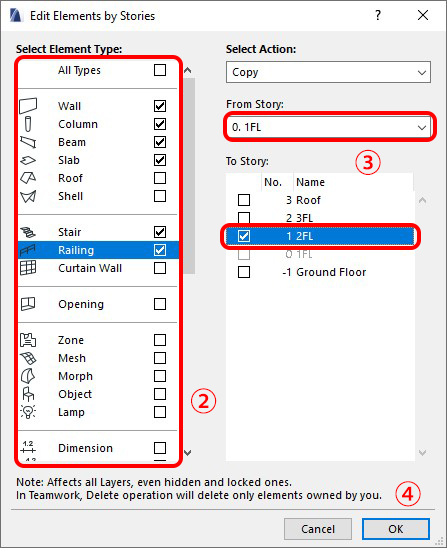
When the Edit Elements by Stories dialog appears:
Here, you can Copy / Cut / Delete elements between different stories.
In this example, I choose to copy the following elements:
Column
Beam
Wall
Slab
Stair
Railing
from 1FL and paste them into 2FL, as shown below.
Then click OK.
Press F5 to open the 3D view and check the model after copying.
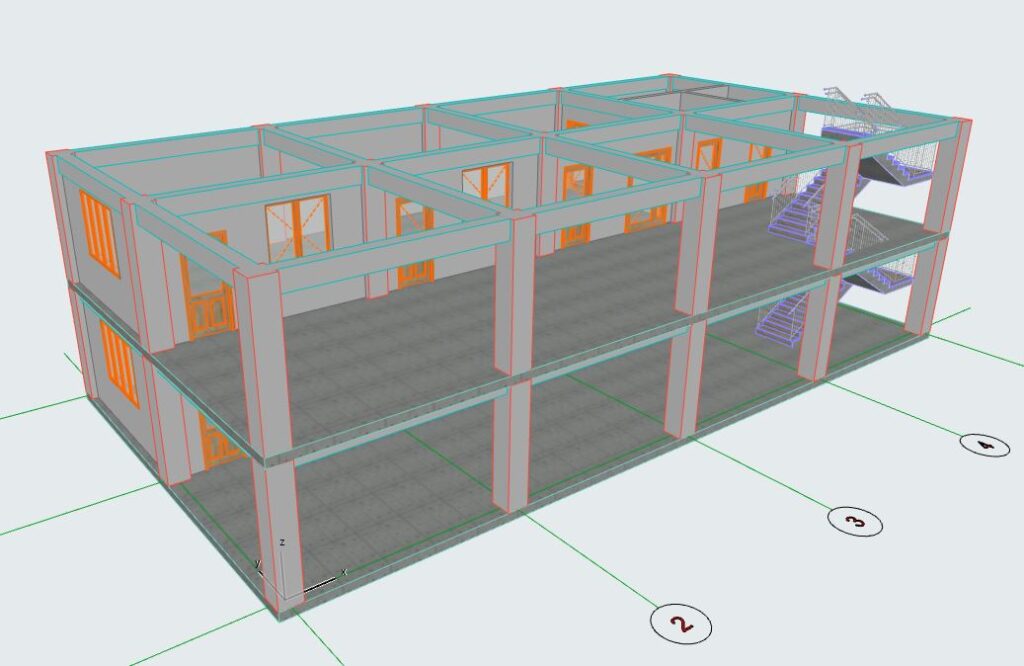
Model after copying
Adjusting the Second-Floor Model
Now that we have the second-floor model copied from the first floor,
we will make some adjustments so the model does not look too repetitive.
In the 2FL view, I move this wall downward by 1500.
Select the wall
Use the Move command (Ctrl + D) to move it
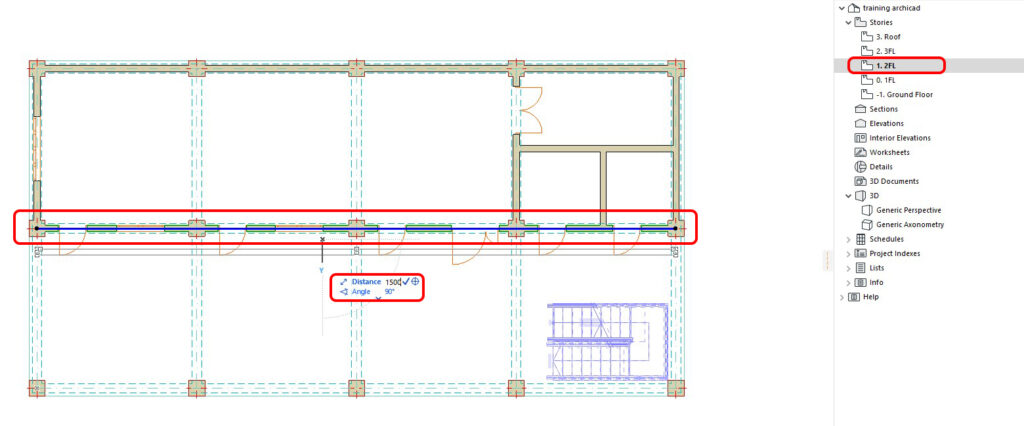
Move the wall down by 1500
Fixing Wall
After moving the wall, the two corners become disconnected.
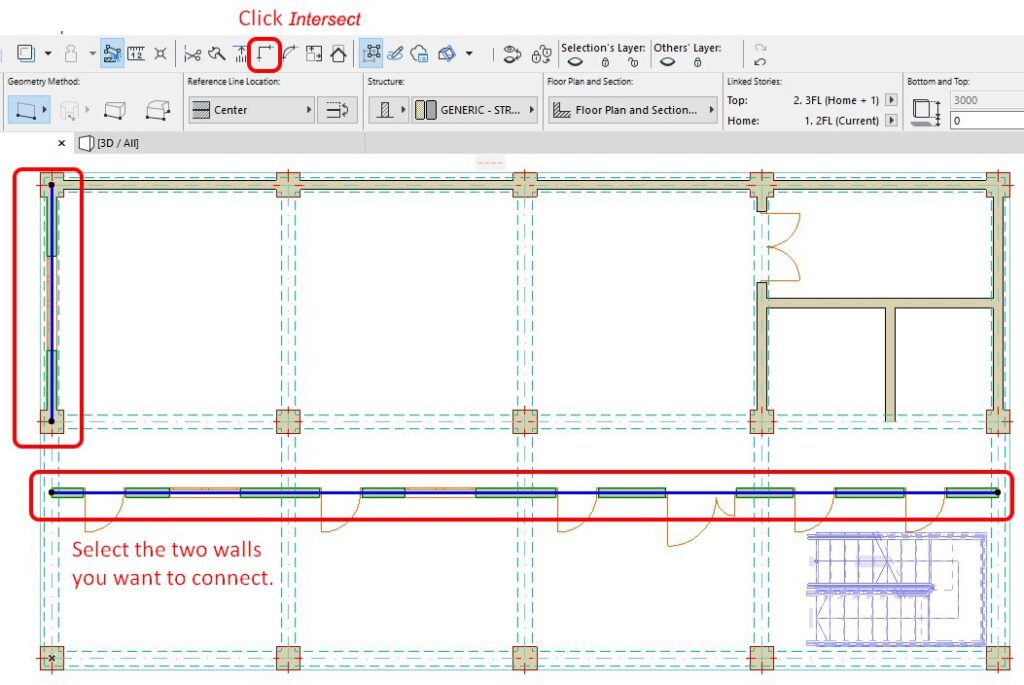
Use the Intersect command to reconnect the walls.

Select the two walls to be joined
Click the Intersect button on the toolbar
Result
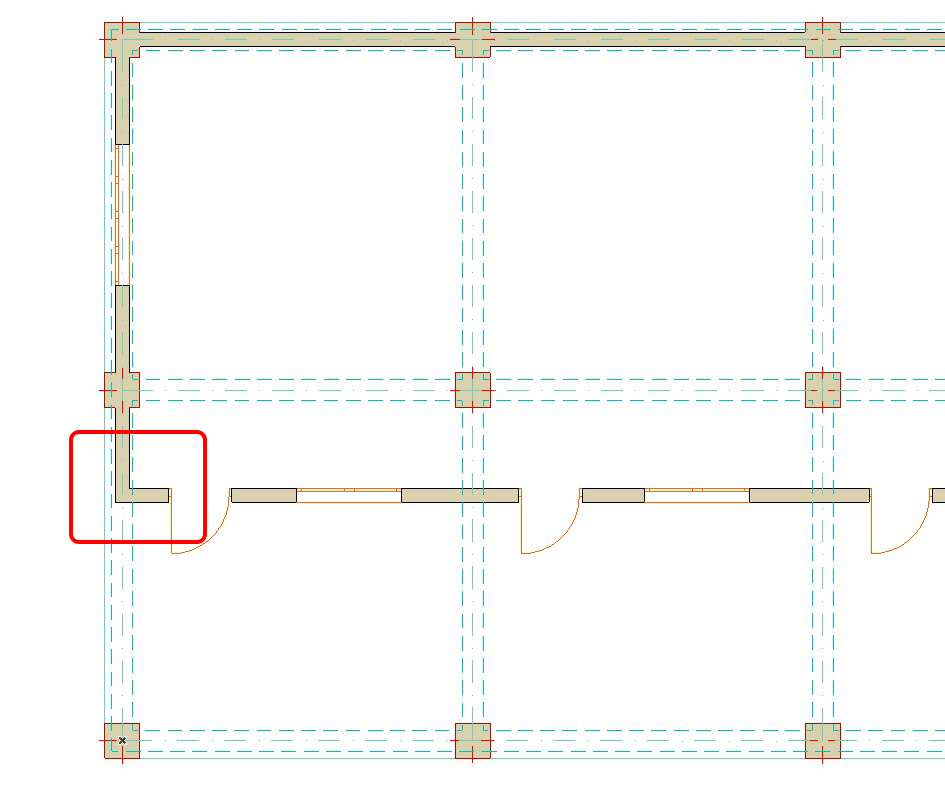 Result after intersecting the walls
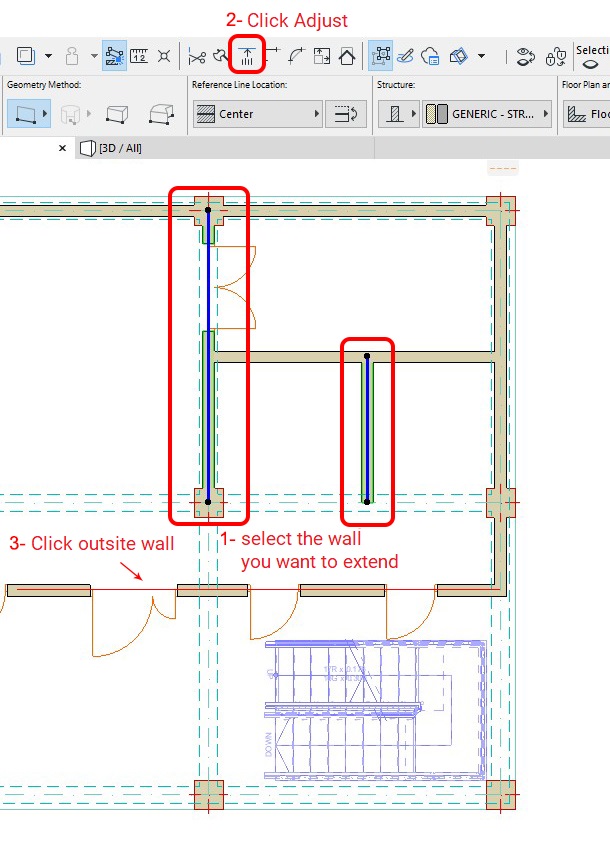
In addition to the exterior corners, you will notice that some interior walls on the second floor no longer align with the exterior wall.
For this case, use the Adjust command.
Steps:
Select the walls that need to be extended
Click Adjust on the toolbar
Click the target wall to extend to
(in this case, the exterior wall that was just moved)
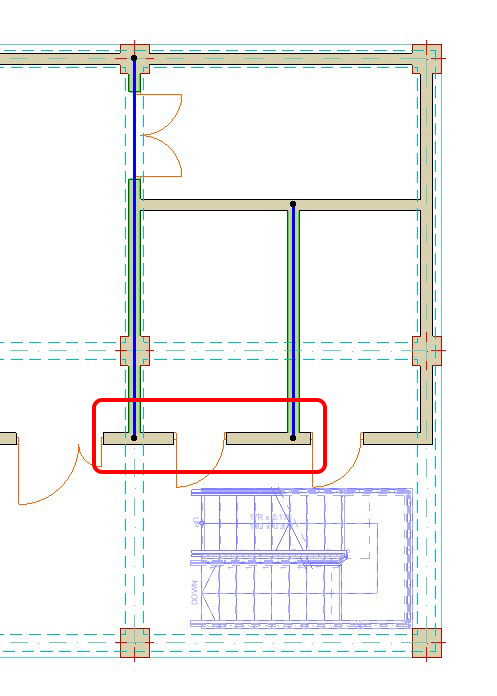 Result
Adjusting Doors and Adding Windows
You can continue adjusting other elements, such as:
Adjusting door positions
Copying additional windows
Copying additional doors
…depending on your design needs.
Here, I adjust the positions and add some windows.

Adjusting the Slab Opening at the Stair Location
At this point, the model looks like this.
In the model, you can see that the slab overlaps with the stair area
(the highlighted red zone).
Therefore, we need to adjust the slab boundary at the stair location to make the model more reasonable.

Steps:
In the 2FL view, select the Slab
Click on any edge of the slab
In the Palettes panel, select the minus (-) icon
Draw the area of the slab to be cut out

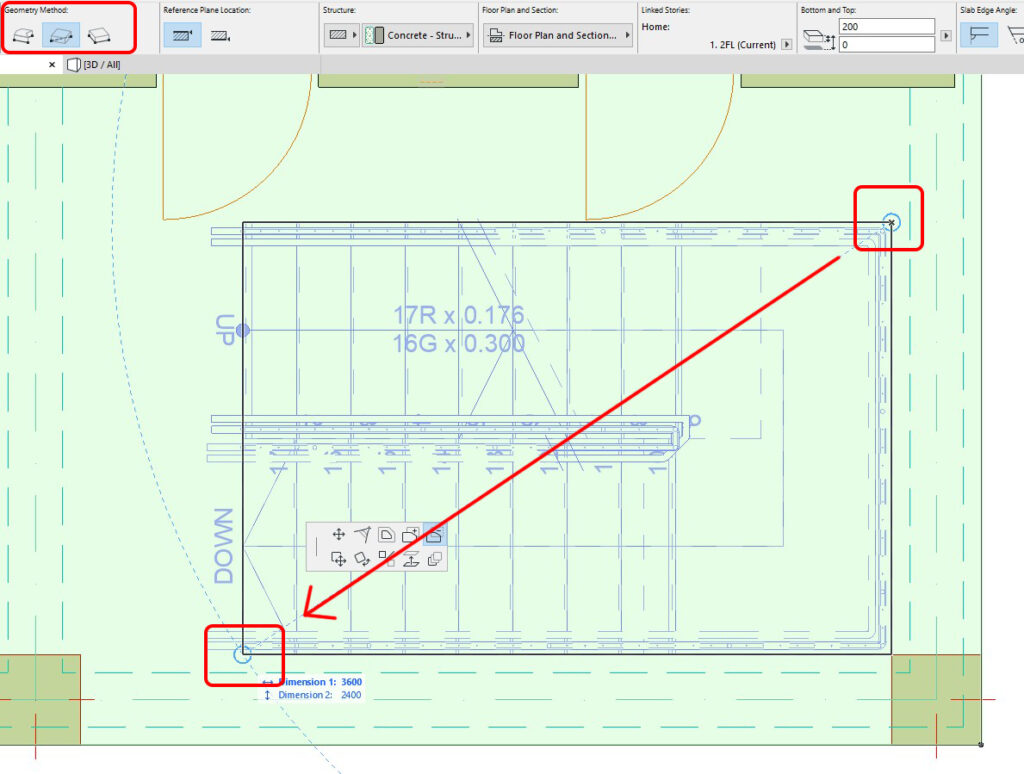
Make sure the Geometry Method is set to Rectangular, then select the slab area to be removed

Model after cutting the slab at the stair location
In this lesson, we created the second-floor model by:
Copying the model from the first floor
Adjusting several elements to fit the new layout
In the next lesson, I will introduce a new tool — Curtain Wall, which is used to create glass façade walls for the building.