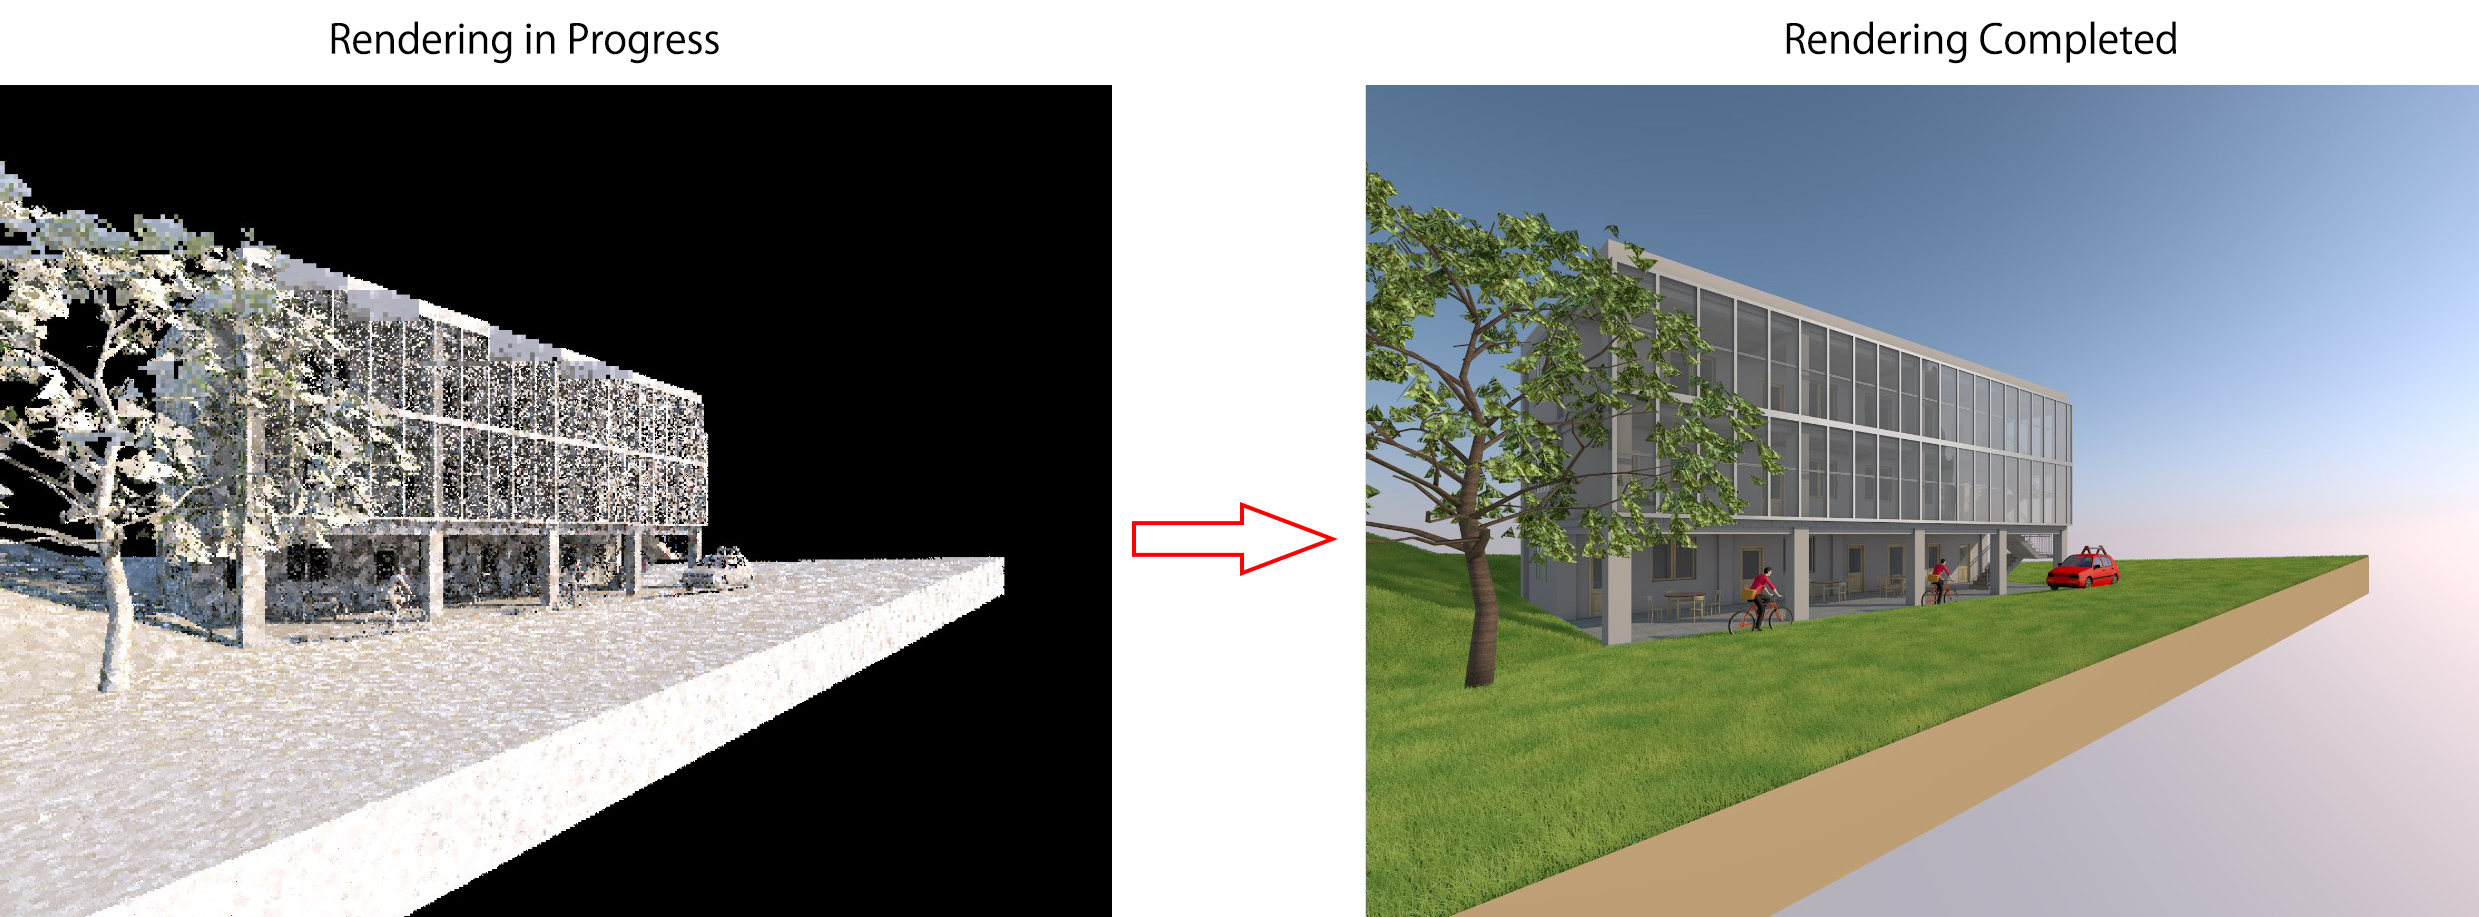
In this lesson, we will add a Curtain Wall to Floor 2.
A Curtain Wall can be simply understood as an exterior enclosure system of a building, usually composed of aluminum frames and glass panels.

1. Open the Curtain Wall Tool
Double-click the Curtain Wall icon on the Toolbar.

2. Curtain Wall System Settings
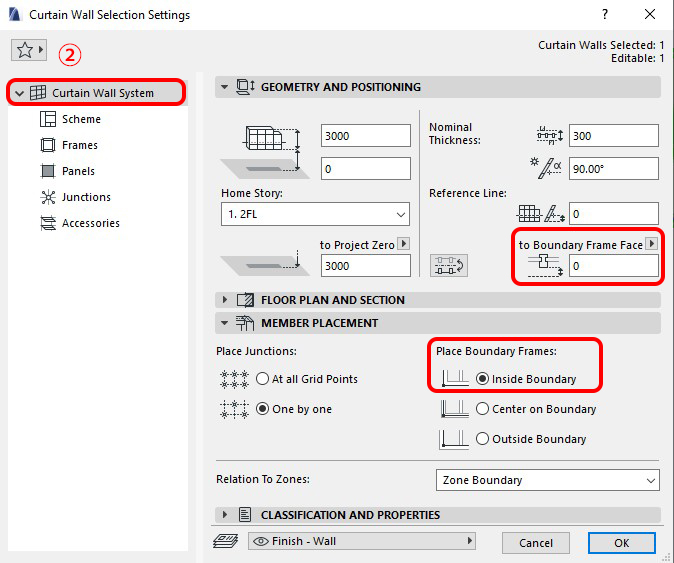
In the Curtain Wall System Settings dialog, set the parameters as shown below:
Reference Line: select to Boundary Frame Face
Place Boundary Frames: select Inside Boundary
3. Scheme Settings
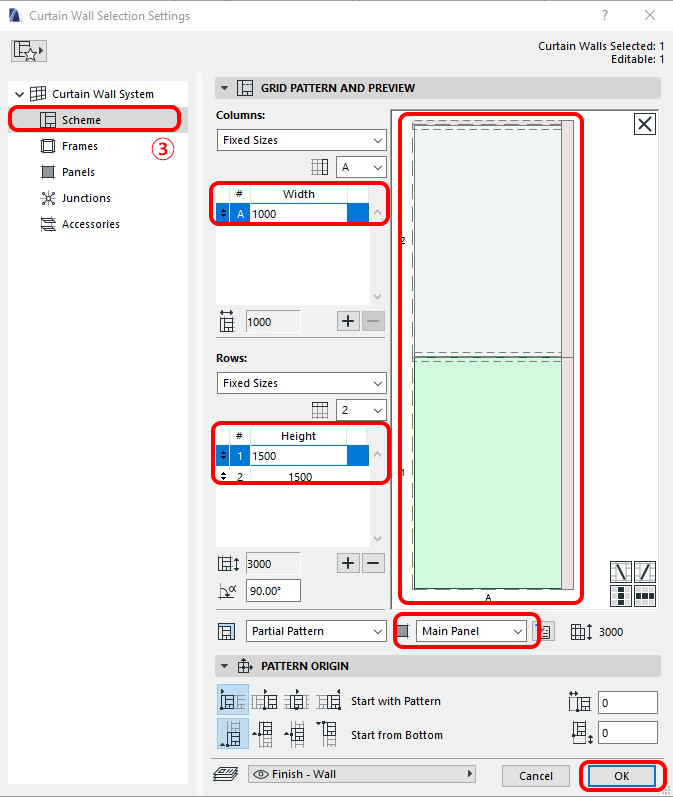
Next, go to the Scheme section and set the following parameters:
Width: 1000
Height: 1500
Notes:
Change the panel type to Main Panel or Distinct Panel
Click OK
4. Draw the Curtain Wall
Draw the Curtain Wall from left to right.

Press F5 to check the model in 3D view.

Copy the Model to Floor 3
At this point, we have completed the model for Floor 2.
Now, we will create the model for Floor 3 by copying it from Floor 2
(similar to the method used for Floor 2; you can review the tutorial on modeling Floor 2 if needed).
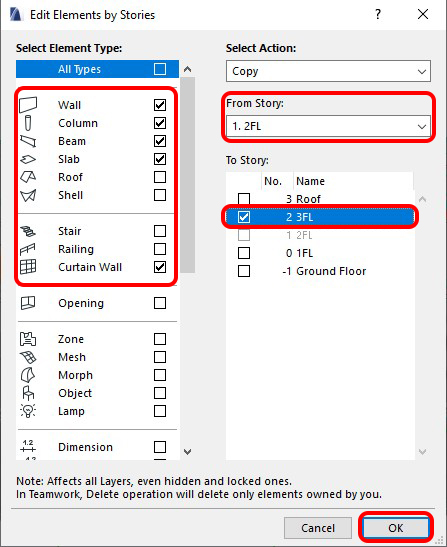
In the Edit Elements by Stories dialog, I will slightly adjust the selections:
Uncheck Stair and Railing
(because this building has only three floors, so there is no staircase on Floor 3)Add Curtain Wall
Click OK

Now we have completed the model for all three floors.
In the next lesson, I will guide you through modeling the roof and the parapet walls on the roof.